Loading page header ... or Your browser does not support JavaScript
Next Building the 'Piragua':The "Piragua" is a 4.65 m plywood chine dinghy. She is constructed using the stitch and glue (or tack and tape) method and is assembled in a cradle. Both port/starboard hull panels are made up on the bench prior to assembly. The inwales (inner gunwale), seat top stringers and floor stiffeners are glued on to the panels while on the bench. |
|
 |
 |
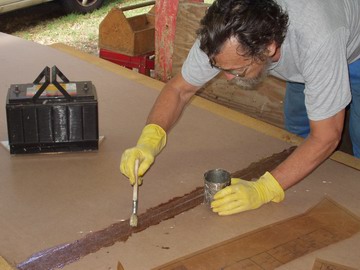
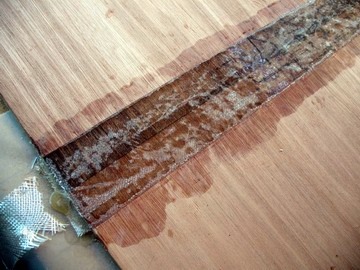
| 20-10-2011: Joining two sheets of 3mm MDF to make up a long enough board for the templates. Here I am making a butt joint with glass/polyester.. A taped butt-joint of course! | Mylar film as release, spreader plank (16mm MDF board) and weights till polyester has set.. Note: I use two large particle boards layed loosley on the strongback to form a large temporary work table |
|
 |
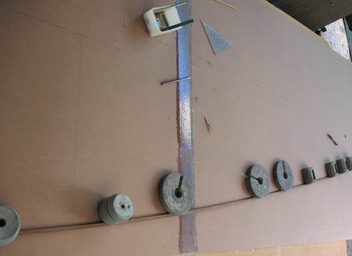
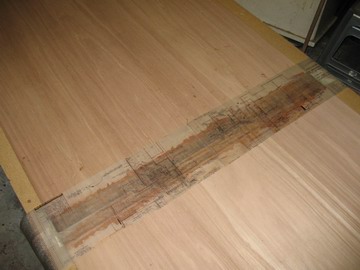
| Lofting hardboard (MDF) patterns/templates for hull panels.. Note fiberglass butt-joint. | Templates cut out and internal fitment lines transferred to templates. At intervals of about 100mm holes are drilled through those lines so one can mark off from either side to the plywood using a fine-point felt tip pen. |
|
 |
|
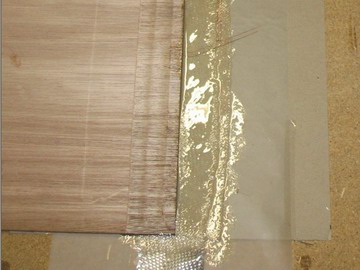
Next we join two sheets of plywood each to make up the bottom and topside panels. We use the epoxy/glass taped butt joint. Step 1: place Mylar release film, followed by layup of glass and epoxy, one board placed on wet layup, centered. |
The other board is butted up to this..and then another layer of glass epoxy added on top and covered with Mylar film. I like to recess the outer layer of glass, the previous pic shows this recess quite well. |
|
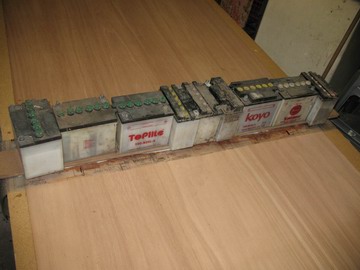 |
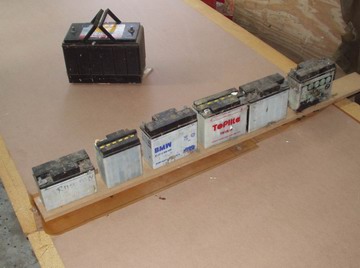
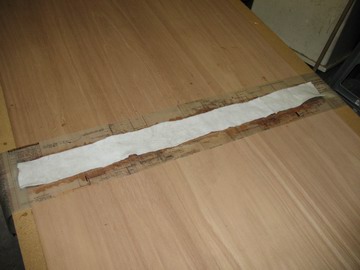
| A layer of soft fleece before spreader plank goes on.. | Spreader plank and weights till epoxy has cured. Note that bottom and top glass/epoxy layers are done in one go. |
|
 |
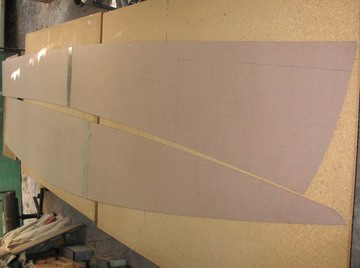
| Finished joint after peeling off the Mylar film. On the prepared blank, which in this case consists of two 2.44m x 1.22m plywood sheets, place the templates, run a pencil around and then cut out using a jigsaw (sabre saw). | A fine-tooth metal sawblade (24tpi) allows one to cut to within a millimeter of the line. Coarser sawblades chip and tear the top veneer. Use a sharp plane to finish the shape accurately. Leave half the width of the line. We end up with a topside and a bottom panel each that is as accurate as we can make it. |
Next
Top of Page
Loading first page footer ... or Your browser does not support JavaScript
Loading second page footer ... or Your browser does not support JavaScript