Loading page header ... or Your browser does not support JavaScript
>
Next Building the 'Samba':This is how the 'Samba' design came about: It started with my experiment with a square top sail hoisted on a free standing, two-piece mast on 'Alegra' (Experimental sail for "Alegra"). I liked the simplicity of hoisting the sail on rings and did a lot of sailing with this rig as the boat was so quick to get on the water. There is always quite a bit of wind where I sail so the relatively small sail area was not always a draw-back, but it was noticeable. The sail area had been determined by the fact that the sail was made from a jib I had bought cheaply. 'Alegra' is a small boat, but with a strong wind she would plane in the gusts, which is exciting. After the gust passed she of course squatted down again, she is after all not meant to be a racing boat. The idea of having a boat that would plane easily and have an efficient rig emerged gradually, while sailing Alegra. Speed and planing capability depend on hull length and shape so the new boat would have to be a little longer. Sail and mast should incorporate the experience gained with Alegra's experimental rig. Juggling the various parameters for a new boat always takes a while. The main ones for 'Samba' were,
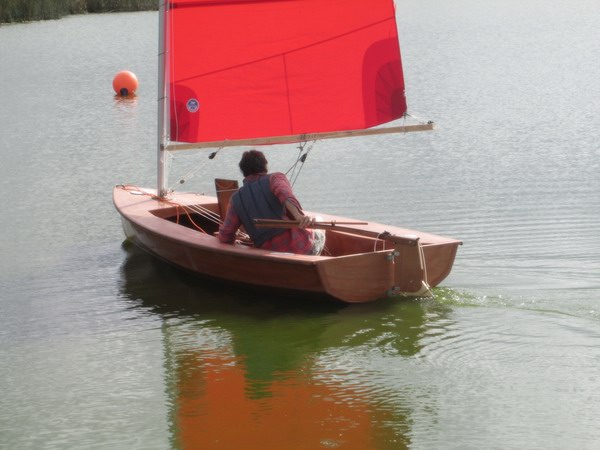
I liked Alegra's flat keel strake and single chine hull shape, which makes construction relatively easy, but felt I needed to get nearer to a round hull for better overall speed, so went for a double-chined hull shape as a compromise, rather than building a stripper. She has a relatively narrow waterline beam and retains the flat keel strake. On deck I wanted enough beam for sitting and hiking out. The experimental sail had a sprit boom. For this new boat I wanted more control, so a conventional boom with vang, outhaul and downhaul controls was opted for. The sail, to keep the rig low, has a square top and is fully battened. Dagger vs center board: I opted for dagger board, mostly because the center of effort hardly moves whether it is up or down. Launching and returning to the ramp is in thin water and a dagger board lets one tack better under those conditions. A shorter slot in the hull also means less drag. More space in the cockpit and simplicity of build are further positive factors. Below two pics of the first sail. Light wind, but showing promise of speed. |
|
 |
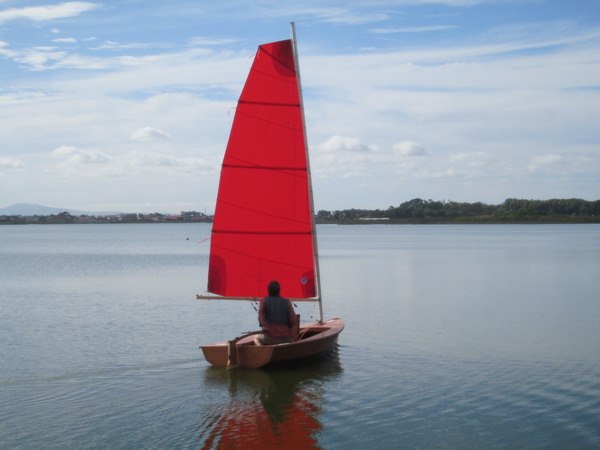 |
| She has a fine entry and a lovely transom! | Waiting for a puff, but even with light wind the sail's air-foil shape is perfect and pushes her along with a chuckle of the bow wave. |
|
 |
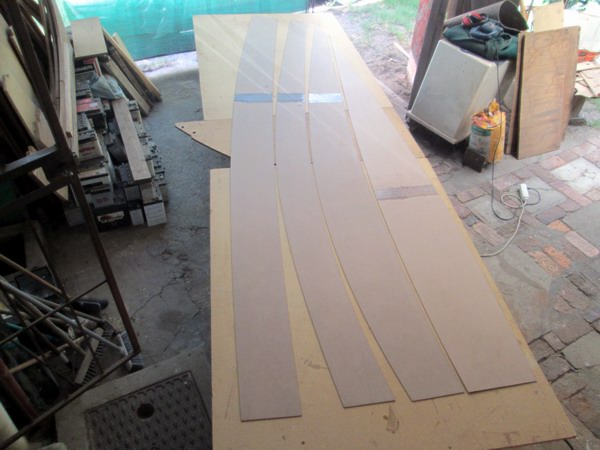
| And now to construction, I always make templates of the hull panels as it makes marking out on the plywood blanks so much easier. | Plywood blanks are assembled using glassfiber butt joints. Keel strake blank at left, half of a complete hull panel blank at right. |

|
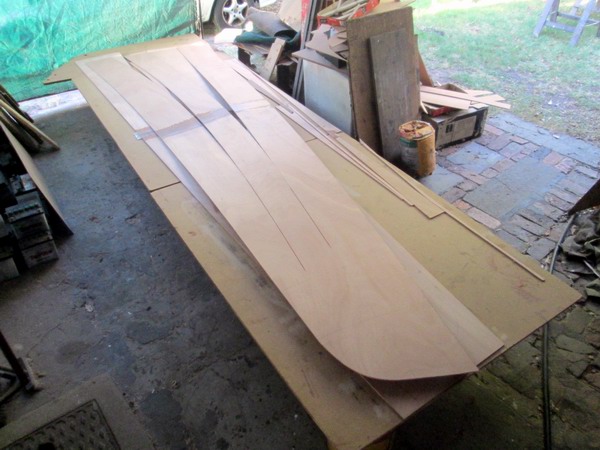 |
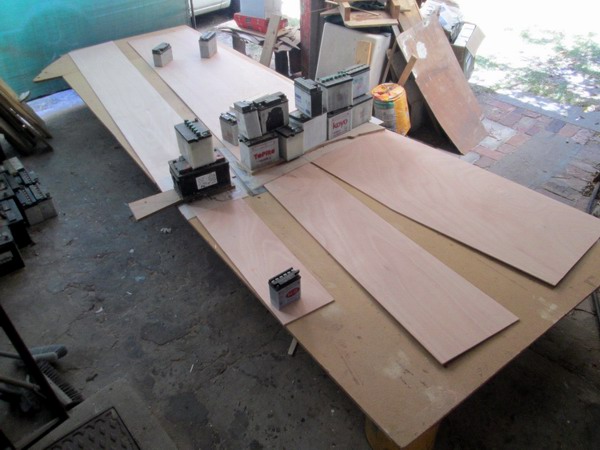
| Templates located on blank to mark out. | Both hull panels cut out. |
|
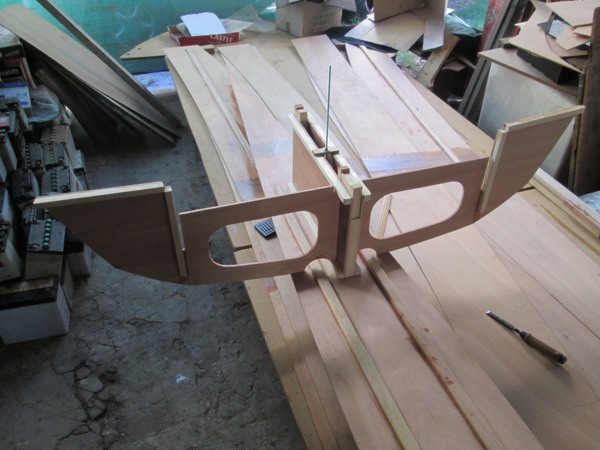 |
| Keel strake and hull panels having floor stiffeners glued on. | Dry-fitting dagger board case and mid bulkhead halves. |
Next >
Top of Page
Loading first page footer ... or Your browser does not support JavaScript
Loading second page footer ... or Your browser does not support JavaScript