Loading page header ... or Your browser does not support JavaScript
| |
|
|
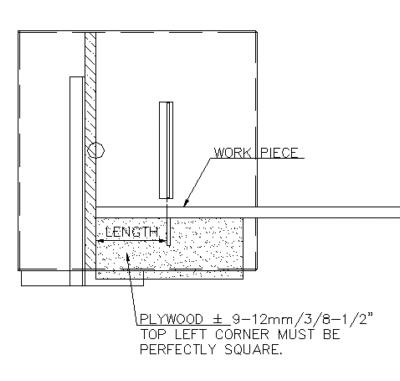
How to cross or square cut lumber Refer to the drawing at right for details. The saw table as described earlier, complete with fence, is used for this operation. The cut is guided by a board. The board can be plywood as shown on the drawing, but MDF will work very well too. It is such a simple aid to cutting that it cannot really be described as a jig. Any piece of offcut can be pressed into service, the only requirement is that there is a square corner between saw fence and the edge of the board that guides the lumber. This gadget comes into its own if you need to make repetitive cuts of the same length, like making the cheap clamps described in Wooden cramps |
|
|
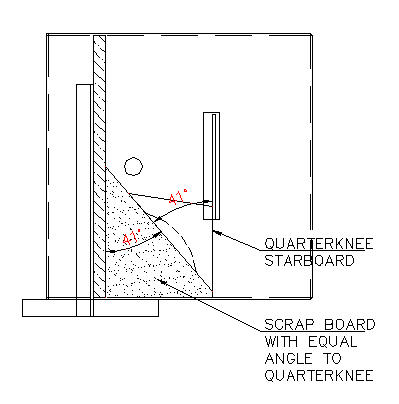
How to cut at an arbitrary angle while at the same time performing a bevel cut This may be a confusing heading I admit - so I better explain. Typically this is how you make up breasthook and quarter knees for your boat. I will explain the cutting of quarterknees as there are more operations than for a breasthook. A quarterknee is essentially a triangle, so we will need to make up an angled board from scrap that allows us to cut the angles the knees have in plan view. As the drawing at right shows - the plan view angles are fairly straight forward - the scrap board really only needs to be cut to the angle of the 'pointy' side of the quarterknee. The admittedly tricky bit comes now, there is a different bevel angle for each leg of the quarterknee, depending on whether it meets the topside or the transom. |
|
But like with everything there is a way to deal with this and here is how we do it:
|
|
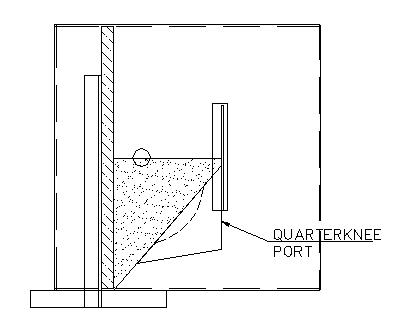
Using the last bevel setting (transom angle in our case) cut one knee with the angle (feeder) board in the original position and the other with the angle board reversed. Then change the bevel angle to the topside angle and cut the second leg of the second knee, reversing the angle board back for the first knee. You may want to use a marker pen to write port / starboard on the relevant sides of the angle board to avoid confusion. The angles and bevels should be perfect now and all that is needed is to mark out the scalloped side of the triangle and cut it out with a jigsaw. The breasthook is simpler to cut as there is only one bevel angle and of course there is no port/starboard complication. So maybe this is the one to start with! Good luck. |
|
Loading first page footer ... or Your browser does not support JavaScript
Loading second page footer ... or Your browser does not support JavaScript