Loading page header ... or Your browser does not support JavaScript
Previous page <> Next Building the 'Swift' - part 2:This is the next stage in the building of the "'Swift'". In the previous section the hull panels were unfolded into the building cradle and the initial shape controlled with wire ties.Next we will epoxy/glass the joints (- or 'tape the seams'). But before glassing we have to tweak the hull shape some more. The joints in the forebody require more control than the wire ties can achieve. The plywood needs to take up curvature and due to its stiffness resists this. |
|
 |
 |
|
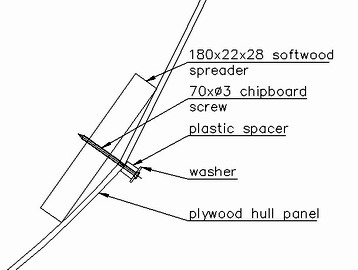
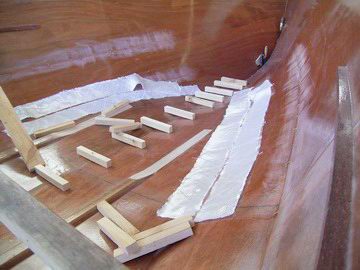
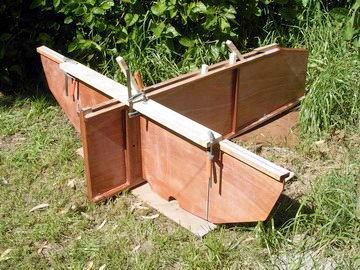
The way I found that I could 'encourage' the ply to curve more and at the same time close the joint is to make up some spreader battens as seen in the picture above, left. The battens are used in conjunction with long chipboard screws inserted from the outside. Before inserting the screws in the joint it is best to drill a slightly oversize hole to prevent the screw wedging the joint open. By tightening the screws in turn it is easy to get a fair line. With this technique it is possible to achieve a smooth transition from chine to round bilge shape in the bows. The next picture shows the joint prepared by sanding and the glass tapes are ready for glassing. |
|
 |
|
|
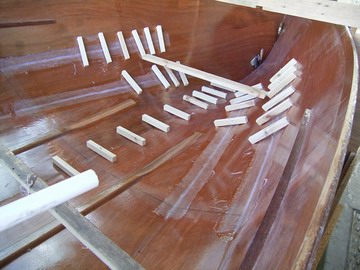
In the picture above all joints are glassed with the spreaders in place. A cordless drill is a must for this operation, but take care not to snag the glass. The pic on the right is from a different viewpoint and was taken after the stem had been glassed too. |
|
 |
|
|
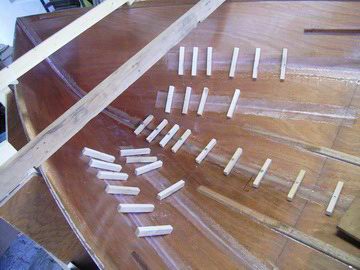
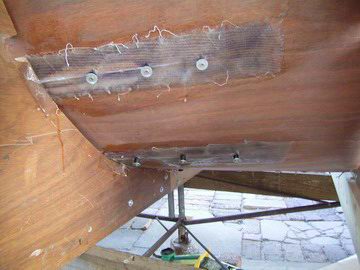
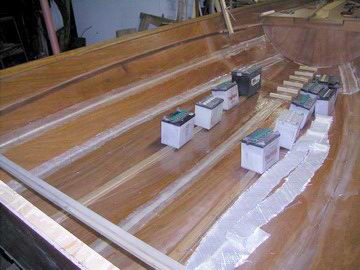
The picture above shows a close up of the outside of the upper chine. Normally I do not glass the outside of joints till the interior is finished and the hull has been turned over, but in the transition area I decided to glass also on the outside to make sure the shape is well locked in place. To do that both inside and outside tapes have to be wetted out and then the spreaders applied and screws driven in from the outside. To make sure the chipboard screws don't get glued in permanently, I put plastic spacers and washers under the screw heads. Above right: The upper port side chine has just been glassed, the lower chine and the keel joint are in the process of being glassed and are partly wetted out. The batteries hold the bottom panel down. By placing a few weights on the floor stiffeners the bottom conforms better to the cradle. The taped seams must set up with the hull panels having the correct angle and shape. |
|
 |
|
|
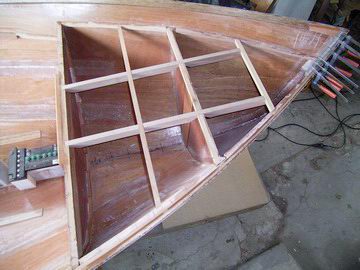
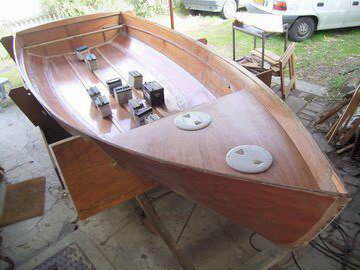
The foredeck is framed up prior to gluing the deck down. Right: the foredeck is glued in. It was fun to put the inspection hatches in the cutouts. Note the keelhog is already glued in too. |
|
 |
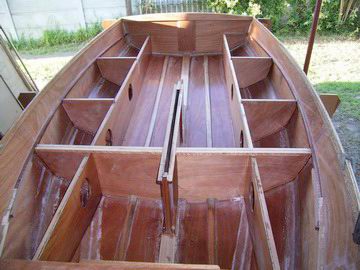 |
| The centerboard case and mid-bulkhead form one unit that slots into the seatrisers and beds down on the keelhog. The last picture shows the seatrisers, centerboard case/bulkhead assembly and part bulkheads glued in. These parts have been pre-assembled in advance and during dry-fitting I made sure everything fits nice and snug. |
|
Top of Page
Loading first page footer ... or Your browser does not support JavaScript
Loading second page footer ... or Your browser does not support JavaScript