Loading page header ... or Your browser does not support JavaScript
Previous page <> Next Building the 'Swift' - part 4:Continuing the building of the "'Swift'". In part 3 the gunnel, quarterknees and breasthook were fitted. In the meantime all the sharp corners and edges have been rounded off with the router and sealed with epoxy.The only thing still to be done before turning the hull over is installation of the mast-base and drilling the holes for the mast-gate, which is a loose item thru-bolted to the bulkhead. |
|
 |
 |
|
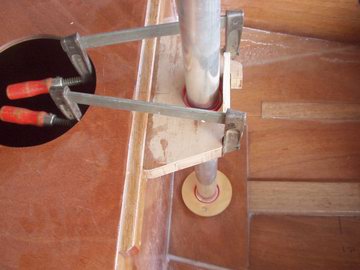
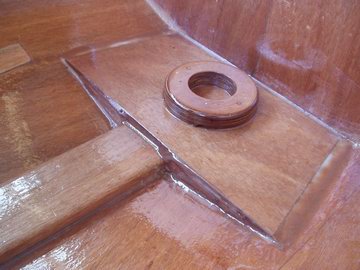
A plywood base straddling the keelhog has already been glued down. The pic at left shows the setting up process. To get the alignment perfect it is best to clamp the mast-gate and keep a template of the mast-base ring loose and movable. The actual aligning is done with an offcut piece of aluminum pipe. I did not have a pipe of the right diameter handy so I used spacers to make up for the smaller diameter. Aligning the temporary "mast" is done by sighting across a large carpenter's square set up on a batten across the gunnel. In the pic at right, the mast-base ring made up by laminating four layers of 6mm plywood has been glued down and all interior surfaces sealed with epoxy. |
|
 |
|
|
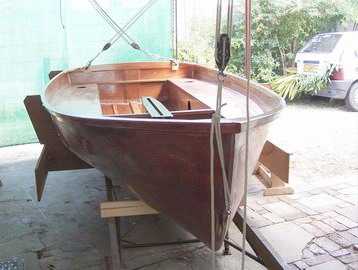
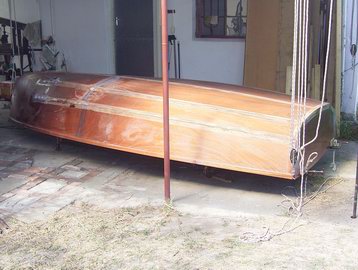
Left pic: As the hull only weighs 85kg (185lb) it would be feasible to turn it over with a few helping hands. If you prefer to single-hand it as I do, use three handy-billies with jam-cleats. This gives you full control over the operation. Make sure to arrange the tackles on the transom diagonally before you start. G-clamps and plywood padding provide two attachment points on the transom. The towing U-bolt at the stem forms the third point. Right pic: The assembly cradle has been dismantled after lifting the hull slightly. To turn the hull over simply lift one side of the stern end of the boat and lower the other. Keep on lifting till the hull has been turned through 90 degrees and then push it past that point and lower away on the same tackle. |
|
 |

|
|
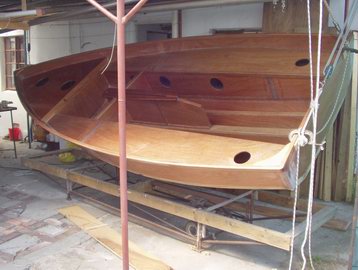
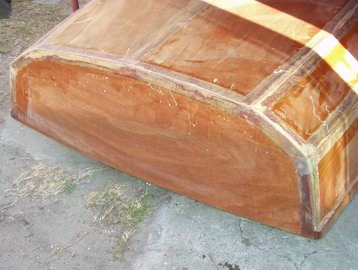
Left pic: Bearers have been placed across the base to support the hull via the side seats. This makes it nice and low so that it is easy to work on hull. Glassing of the stem/keel, chine and transom joints is done after filling and sanding the joints. It is worthwhile to prepare the joints well. A small (3") belt sander is very useful for this work. Make sure that there is a good radius for the glass: 9-10mm (3/8") is fine. Taking care with the preparation will save a lot of time later when you apply fillers over the glass tape. Right pic: A view from the stem shows the glassing job completed. |
|
 |
|
|
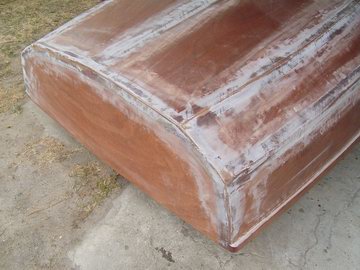
Left pic: Another view, this time from aft, shows all the seams around the transom hve been taped up too. Right pic: The glass-epoxy tape has been sanded alround using a beltsander to remove all material proud of the plywood. The hollows and the weave or other irregularities of the glass tape were then filled with epoxy paste and sanded once more. Carry on filling and sanding till there are no more hollows. You can mix your own paste with Aerosil and French Chalk as fillers. This compound is easy to sand and does not clog the grit of the sanding paper - unless the epoxy is still too green. |
|
 |
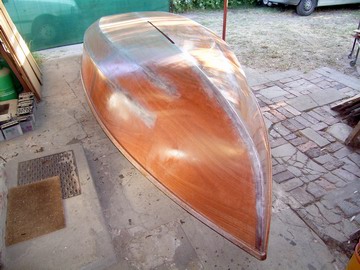 |
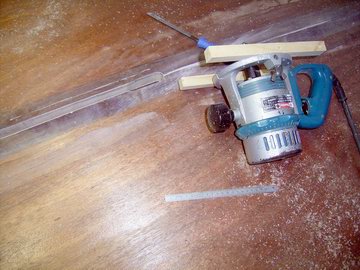
| Left pic: Cutting the centerboard slot: - an undersize slot was cut with a jigsaw. The finish cut is done with a 'flush-trim' router bit. This is the best way - certainly the fastest to get a perfect finish. The cut surfaces have been sealed with epoxy. Read more about cutting the centerboard slot in Router Tips The last picture shows the hull after an application of epoxy mixed with the same fillers previously used for making the paste, but this time we only want a 'thin syrup' consistency so that it spreads easily with a squeegee. The next step will be to finish sand the hull before painting. Note that despite the fillers, the finish is glossy and transparent - a good preview of what the painted hull will look like. |
|
Top of Page
Loading first page footer ... or Your browser does not support JavaScript
Loading second page footer ... or Your browser does not support JavaScript